
The Siding Installation Process
Replacing your siding is a significant investment, and understanding what to expect can make the project feel less overwhelming. Siding installation may seem complicated at first, but breaking it down into steps makes it easy to see how siding completely transforms your home, from the initial quote to the final walkthrough.
Step: 1: Requesting Your Quote
The process of siding installation begins by reaching out to multiple siding companies for an initial quote. It’s smart to do some research beforehand—read reviews, look at past projects, and prepare a few key questions to ask the siding company to ensure they are experienced and reliable. For the best results, gather multiple quotes and compare not just pricing, but also the quality of materials, warranty options, and reputation of each contractor.
During your first meeting, the company should inquire about your home, siding goals, and budget, and then schedule a time to inspect the current condition of your exterior. From there, you’ll receive a preliminary siding replacement estimate to help guide your decision.
Step 2: Choosing Materials and Finalizing Details
Once the initial estimate is complete, the next step is selecting siding materials and design features for your home. This is where you’ll choose the type of siding, color, trim, and any extra accents that will define your home’s curb appeal. A trusted siding company like J&S Siding will guide you through the pros and cons of each option, allowing you to find the best fit for your style, budget, and long-term needs. During this stage, your contractor will also go over the project timeline, confirm the scope of work, and address any additional elements, such as soffits, fascia, or window trim, that may need to be included. Finalizing these details early helps avoid surprises once installation begins.

Step 3: Approving Your Quote
After the project details are finalized, you’ll receive a formal quote that outlines everything, including materials, installation timeline, and the payment schedule. Take the time to carefully review this document to ensure that all agreed-upon details are included, from the siding type and trim to any add-ons or warranties. Once you’ve signed the contract and approved the quote, your project moves into the scheduling phase, where a target start date is set based on material availability and production timelines.
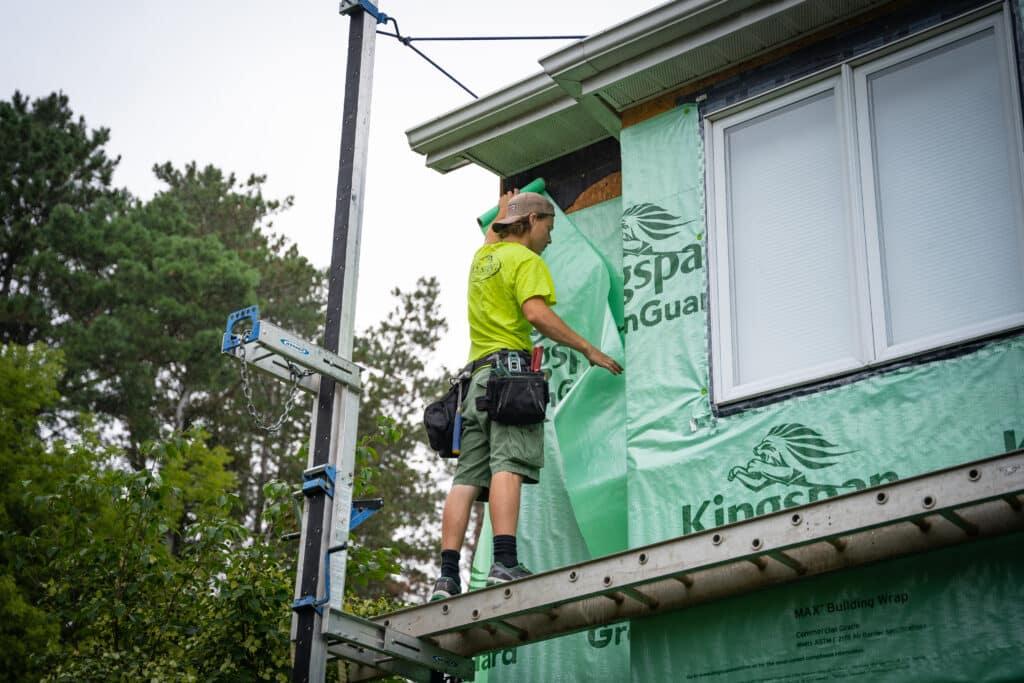
Step 4: Installing the Siding
With the details finalized and your project scheduled, the siding replacement part begins. At this point, the installation team takes over to prepare your home and ensure every step of the process is handled with care.
- Preparation: The crew protects nearby landscaping, walkways, and outdoor features, then removes old siding if necessary.
- Inspection & Repairs: Before new siding is installed, the team checks for issues such as damaged insulation, moisture problems, or foundation concerns and makes any necessary repairs.
- Installation: The new siding, trim, and accessories are installed, using the agreed-upon design and materials.
- Quality Check: Finally, the contractor inspects the work to confirm everything is secure, aligned, and up to standard.
This careful process ensures that your siding is installed properly, giving your home a durable and attractive exterior that you can rely on.
Step 5: Clean Up and Final Walkthrough
Once installation is complete, the team handles cleanup, removing any debris and leftover materials, and all to make sure your property is left neat and tidy.
Next, the contractor conducts a final walkthrough with the homeowner, inspecting the siding installation together. This is the time to address any touch-ups or minor fixes, ensuring the project meets your expectations and is completed to the highest standard.
Tips For A Smooth Siding Installation Experience
A successful siding project isn’t just about materials and labor; it’s also about planning and communication. Follow these tips to ensure a smooth installation process:
- Clear Communication: Keep an open line with your project manager. Ask questions about the timeline, installation steps, and any concerns as they arise.
- Confirm Materials & Details in Writing: Ensure colors, siding type, trim options, and any extras (like vents or accent panels) are documented. This helps to prevent misunderstandings later.
- Understand Warranty & Maintenance: Learn about routine care for your siding and what’s covered under the manufacturer or installer warranty.
- Ask About Financing Options: Explore available financing plans to make your siding project more affordable and stress-free.
Following these steps can help you stay informed, confident, and satisfied throughout the siding installation process.
Transform Your Home With J&S Siding
J&S Siding is a Grand Rapids siding company that specializes in guiding homeowners through every step of the siding installation and replacement process. From selecting the right materials to expert installation and a thorough final walkthrough, our team ensures your home gets a durable, beautiful exterior that stands the test of time.
Ready to upgrade your home’s siding? Schedule a free consultation with J&S Siding today and let us help bring your vision to life.